Results 1 to 15 of 22

Thread: Model 6M has arrived.... And its actually a Hyscore (plus pics) + an unexpected bonus

Hybrid View

Previous Post Previous Post   Next Post Next Post
  1. #1
    Join Date
    Nov 2013
    Location
    chepstow
    Posts
    160

    Model 6M has arrived.... And its actually a Hyscore (plus pics) + an unexpected bonus

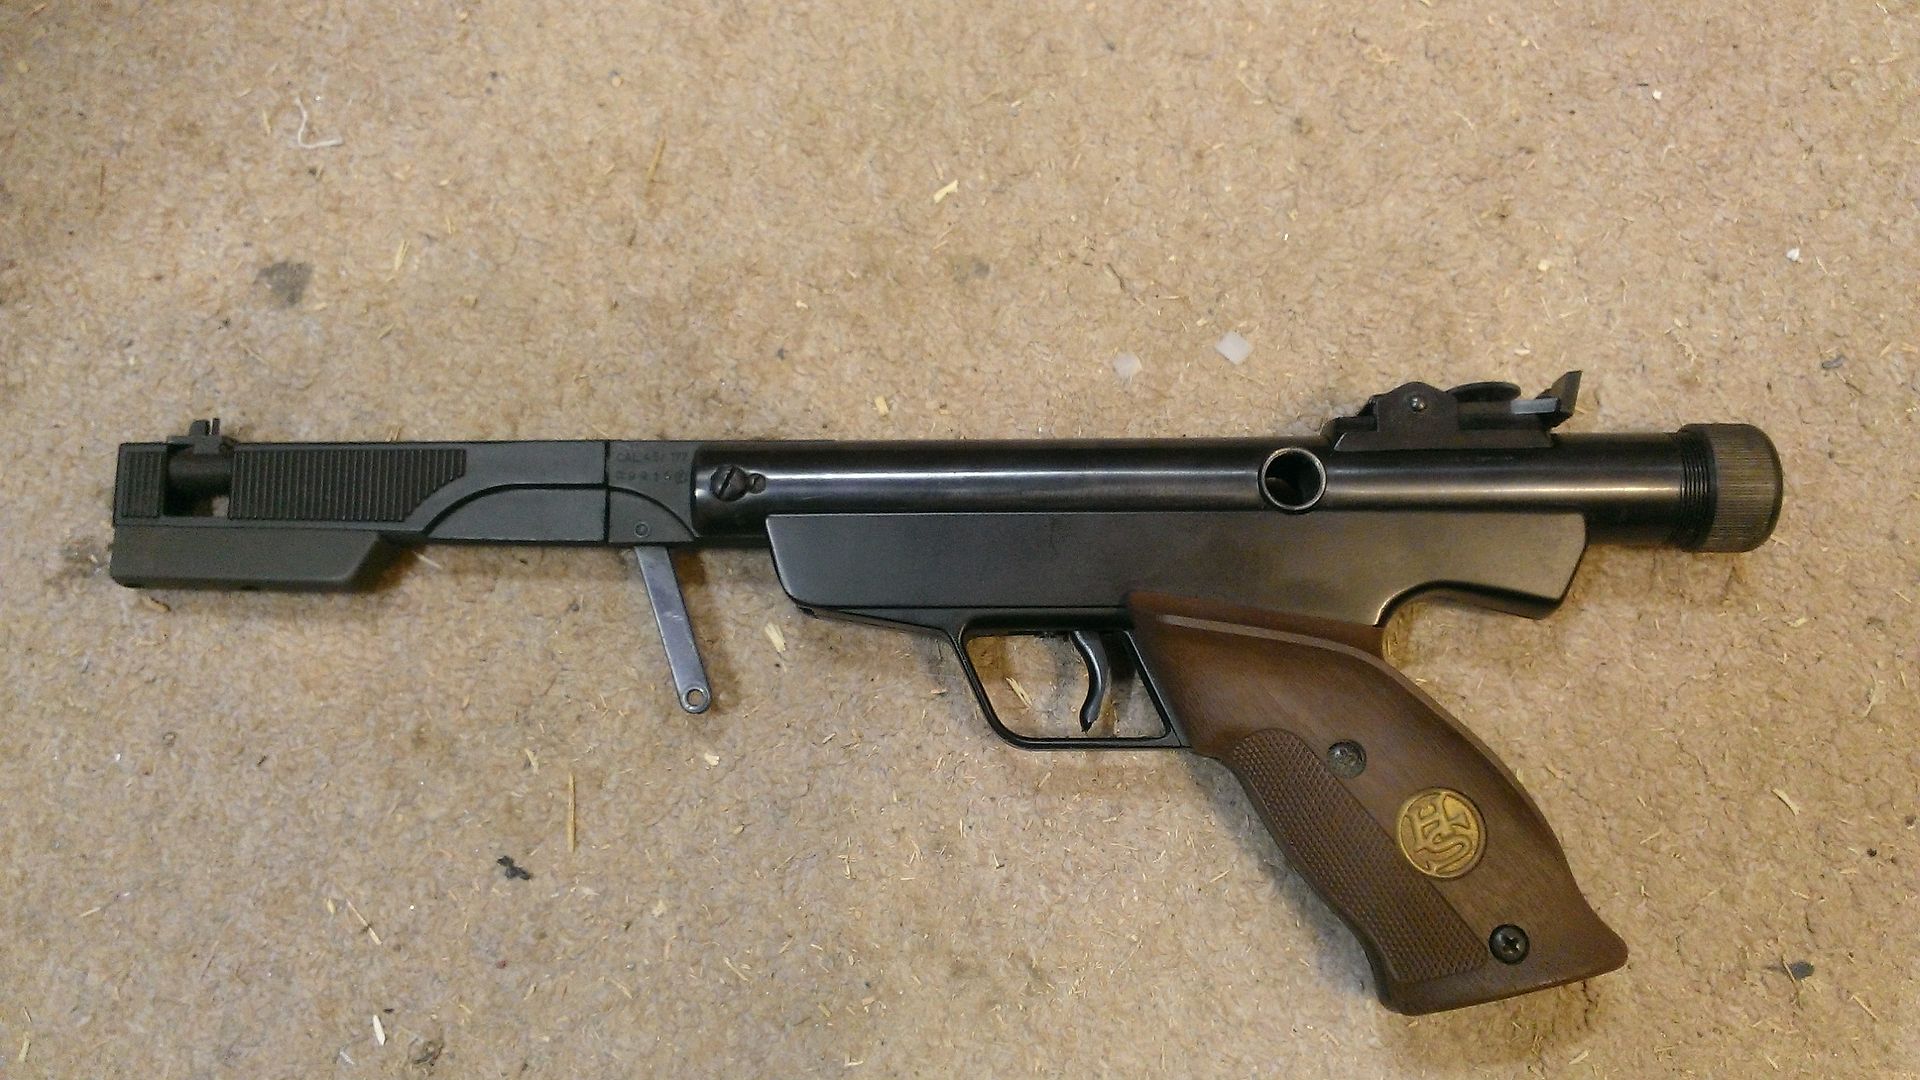
    Well last night my mate came down and delivered the bag of bits to me, uponr inspection its actually marked up as a Hyscore, which after a bit of searching means its and American 6M.


    All the bits appear to be there, and a few that are not supposed to be

    Some pics I took last night in the cave.....


    The cylinder is full of cr@p and in need of a polish, will also give it a bit of a fettle before it all goes together with help from the pages Nige sent me


    And.... while he was stood in the man cave drinking tea, he started stroking a couple of my Airsoft guns and offered me an even swap on a Dragunov SVD-S, which I had just finished tuning and only used once in anger, for his Diana Model 50 he's trying to sell.... how could I say no??!!


    Sean
    Slowly morphing into an RWS/Diana/Original fanboy.

    Definitely a springer fanboy.

  2. #2
    Join Date
    Jun 2012
    Location
    swanley
    Posts
    1,707
    Seen em with both the Original and Diana mark but that's the first Hi Score version I've seen and looks to be in very nice condition, Quite a find
    Steyr LP10, Steyr LP5,
    Vintage Collection - Walther LP53, HW77k Venom, BSF S20 Match, Original 35, ASI Target plus lots more

  3. #3
    Join Date
    Nov 2013
    Location
    chepstow
    Posts
    160
    Quote Originally Posted by nige346 View Post
    Quite a find

    I assume so, like I said in the other thread he used to run a shooting shop some years ago and he kept it from then, quite what its doing in this country is beyond me, but for what I paid for it I dont really care


    Has anyone actually tried to tune one of these pistols, as opposed to just fettle and polish?? Or are they to rare/good to start with to warrant the time and effort?
    Slowly morphing into an RWS/Diana/Original fanboy.

    Definitely a springer fanboy.

  4. #4
    Join Date
    Jun 2012
    Location
    swanley
    Posts
    1,707
    They don't need tuning , If rebuilt correctly they are great to shoot, There really would be nothing to gain in trying to tune but a lot to lose, They're designed to punch holes in paper targets and have enough power to do so with superb accuracy.
    Steyr LP10, Steyr LP5,
    Vintage Collection - Walther LP53, HW77k Venom, BSF S20 Match, Original 35, ASI Target plus lots more

  5. #5
    Join Date
    Nov 2009
    Location
    Monmouth, Land of Wales.
    Posts
    14,441
    Interesting stuff! It's like the front of a Mod 10 plus the rest of a Mod 6 !

    I still wouldn't want to try fixing it

  6. #6
    Join Date
    Sep 2013
    Location
    Norwich
    Posts
    374
    Tried to PM you this but must have been too large - this is something I wrote up when I rebuilt mine - looks like you have a new seal already.

    This is some pointers and advice to those that will rebuild / re seal their Giss (model 6) system pistols at some time. I have just resealed mine and thought it would be a good idea to write up things that you need to be careful of and how to do it right and not damage yourself or the pistol. Here are my thoughts:
    • Chambers have the parts / seals etc.
    • There are stage by stage rebuild instructions on the net read them all.
    • It is not difficult but because it is a well-made piece of kit you need to raise your game when working on it.
    • The threads are fine – think clock makers threads.
    • Two of the screws could be from a clock and they are easy to loose or damage.
    • The rear cylinder cap can be very tight, mine was. The gun was wrapped with a leather welding gauntlet to protect it from the vice yaws but it kept moving. So I used new fibre vice guards on their own , these gripped and did not marks the pistol, these will now go away and only be used for this type of work. I used a leather strap wrench, small chain wrench with leather to protect but to no avail. I used water pump pliers VERY big ones and I mean big, they will open up to 200mm and are big enough to grip the gas suspension balls on Citrioen cars. They are not stilsons! With leather to protect the cap it finally moved, it did not leave a mark.
    • The lock screw hole was drilled after it was all assembled so it will have to go to this mark when the end cap goes back on.
    • The two little screws that lock the cog bearings holders were also drilled after assembly so must go back on the same side as they come off, mark one with tape and the side of the gun with tape it came from. Use jewellers screw drivers to undo the little screws – do not buy a cheap pound-land set, get some real ones.
    • There is one spring that can fly if you are not careful, wear safety glasses and cover it with a cloth when you remove it - it’s the one that holds the bear’s claw I place.
    • The trigger has to be removed - easy pin out job, but there is a hair spring on the trigger make sure you take note of how it is fitted before you withdraw the trigger as it could become dislodged.
    • I did not remove the barrel – support the cocking mechanism parts as you drift out the pin as it is an interference fit.
    • I made up a tool – square taper steel rod fitted into a large file handle, you could use a tang of a file with a cloth around it but do yourself a favour do it right make the tool or a simple spring compressor – this is used to compress the spring and align the rear dummy piston – details are in over haul instructions found on web. Now I have done it without a spring compressor using this tool, I will be making up a simple compressor to help me in the future, as it is a bit of a fiddle / struggle to use this simple tool to replace the cogs on reassembly. Especially as you have lots of newly greased parts and if you drop them you will probably need to degrease them to get the grit off and start over.
    • You need to compress the spring by pushing on the rear dummy piston with the tool as you remove the cog bearing caps, the caps will be tight – leather and pliers will work. The caps will probably come away leaving the cogs behind. Fish them out and they should go back in the same side the same was round as they will have warn to match the rack they run on. Put them on a piece of wire that is marked at one end so it correlates with the pistol side and cap that has been marked.
    • First de-gunk all parts with white spirit using quality “J” cloths to keep paper towel fibres and lint out of your chamber. Use a dowel rod with a slot cut in it and fit squares of cloth in it to reach right inside the chamber. Dry using new pieces of cloth. Go and de-gunk the springs, pistons, caps and cogs while the chamber dries a bit. Now using a new dowel clean the chamber using acetone.
    • Allow to dry, then mix up some graphite powder with acetone and dribble into the chamber – I used a plastic pipette. Allow to dry and then using the dowel rod and a clean cloth burnish the inside of the chamber.
    • Remove old washers with a screw driver. The new washers are quite hard material and you could mangle them putting them on. I made a mandrel from some nylon rod turned in the lathe to 12.5 mm then a taper of 7 degrees to allow the seals to slide up and stretch slowly then pushed over the button while the piston is gently held in the vice. The nylon was lubricated with a smidgeon of silicone oil. The button has an OD of 12.2mm on my pistol. Get yourself a set of electric verniers they can now be bought for under £20 and you will use them for all sorts of stuff.
    • I lubricated my seal using knox grease and the rest of the gubbins with abby gun moly.
    • Putting the front piston in make sure it is the right way up with the runners lining up with the slits in the chamber. Ease the new seal with a blunt screwdriver past all the naughty bits that will try and destroy your good work.
    • Spring in, then rear cylinder, now the only real difficult bit, Compress the spring so the cylinder goes in no more than 1.5mm and put in the gear caps with the cogs stuck on them with grease, use no force slightly turn the rear cylinder to get it to go in – first one easy not so the second one. As one write up says it can take 2mins or two hours took me about 5 mins. But you have to keep that compression on and it is this reason I’m making a compressor for next time as you cannot really see what is going on, and it is a bit hit and miss.
    • You must now line up the holes to put in the locking screws for the bearing caps and the end cap, use a solid wire (gas welding rod) or a jewellers screw driver to feel when the inner and outer hole align – now you did put the caps on the right side didn’t you! Put a cloth under the gun as you WILL drop the screws and you WILL not see them again. Glue the cap screws to the driver with a blob of grease if it helps and remember FINE threads cross easily. Drive them in with the driver with your fingertips till they stop. If they are too proud the hole alignment is not perfect so keep gentle pressure on the screw and turn the cap slowly back and forward feeling the screw slowly in. For the cylinder cap I found a piece of solid wire the same dia. as the hole and used that to align the two parts but I still needed a little adjustment when the screw was driven in.
    • The rest is a simple reversal
    • This took me 3 hours but it was the first time that I had taken a pistol to pieces.
    Did it make any difference? Well the gun shot pellets and they hit the target and sometimes the holes were near each other sometimes they were somewhere random, to me it seemed to have enough power. With the new seals after about 10 shots they started to close up and after 50 shots I would say this gun is very accurate and seems very crisp.
    Hope this helps
    George

Posting Permissions

  • You may not post new threads
  • You may not post replies
  • You may not post attachments
  • You may not edit your posts
  •