Results 1 to 14 of 14

Thread: Aselkon MX-10 in 22cal

  1. #1
    Join Date
    Jan 2022
    Location
    Göteborg
    Posts
    215

    Aselkon MX-10 in 22cal

    I´ll be blunt.
    FOR a piece of ****!

    Don´t even know where to begin...


    So. Bought this thing at a local auction site thinking to myself.. how bad can it be.
    Well.
    It was. New in box, never fired. Whatever..


    Even the shroud was fake. But made that into a working ditto by adding a diffusor of own design. Sure helped.


    Trigger was an absolute joke, and for a bullpup at that not adjustable (seeing how bullpumps normally keep the trigger blade at one point and the trigger group at another being conn by a rod).
    So...


    Sear is hardened so annealed that and drill into it to tap for an M3 grub. Indeed did the trick. Replaced the stock 1st stage return spring for one WAY softer.. and could now adjust to a rather usable trigger setup actually. MUCH better than i imagined.
    Which brings the question, as this is as simple to do WHY isn´t this done at the factory?


    Then.
    *clears sweat from forehead*... it was just used up. Seal on the poppet looked like it´d been around like 20k firings.. In turn the seat buried deep deep within the valve body/regulator body.. out of sight in short.. Looked like someone had tried to clear it up using a hacksaw.

    So no.
    Just plain no.
    As i was clear on that it needed power mods galore.. new valve in order.


    As souped up performance was in mind i opted to make the new assy on a 2mm stem, and in turn regular PEEK for the actual poppet seal. As it turned out.. well...

    No.

    The thing was so warped and crooked down there that i opted to clear that cra* out and simply make a setup where the seat is adjustable.


    Uhu. KISS, and indeed. As you can see it carries an o-ring groove to seal, which works rather well. None the less, seat is per definition thus "floating". In turn easy to remove and modify at that.
    I kept through hole on 6.5mm, and in turn the cavity beneath the seat at 7mm flat.
    Transfer ports in turn.. increased those accordingly, and as this is a regulated gun... i went large.


    Indeed the reg works a little different, but you get it out the easiest by using some sorts of hickey that sports the correct M13*1 thread. Lo n behold.. the barrel thimble for an Impact (et al) is exactly that so..


    Fact is that aside adjusting the unit AND making sure it´s in working order the reg is one of the few things on this unit i HAVEN`T spent time on. Yet.

  2. #2
    Join Date
    Jan 2022
    Location
    Göteborg
    Posts
    215


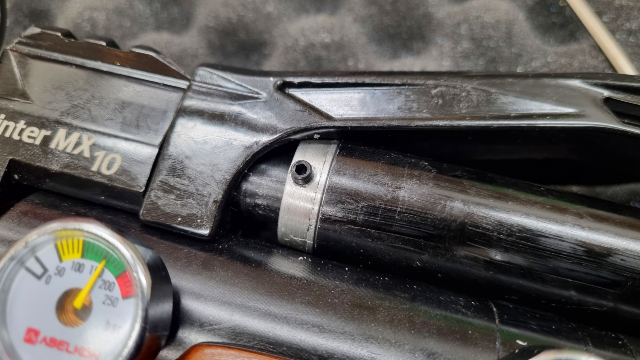
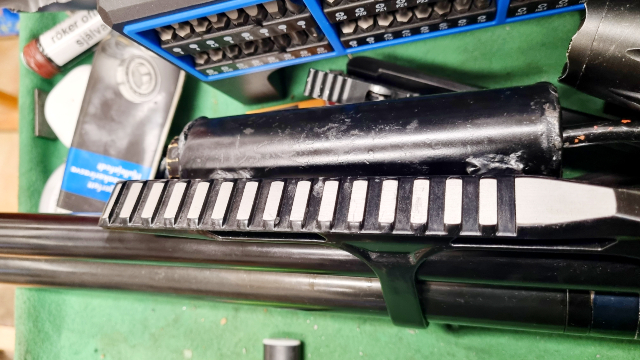
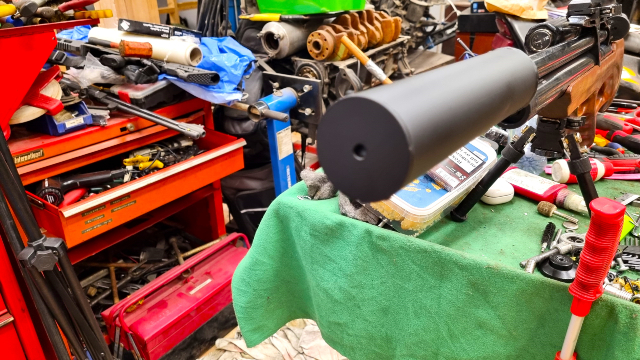
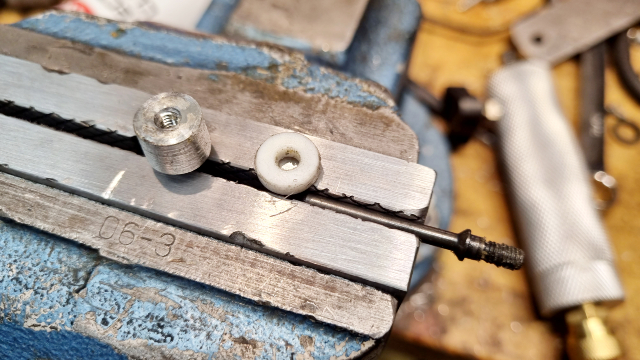
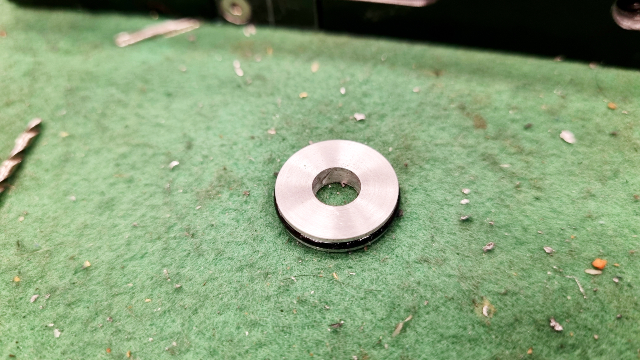
    Uhu. The shroud (again). Had to turn a rear bung for it as well. What´s more.. on 23mm diameter the effects of it is to question to say the least, and as such i REALLY would have liked to see 28mm.
    Only way to handle that though would be via an offset setup.. and them simply look ugly when done. Thus i´m stuck with that puny shroud there as the proximity vs the tank/tube is simply to small all said to go any larger.


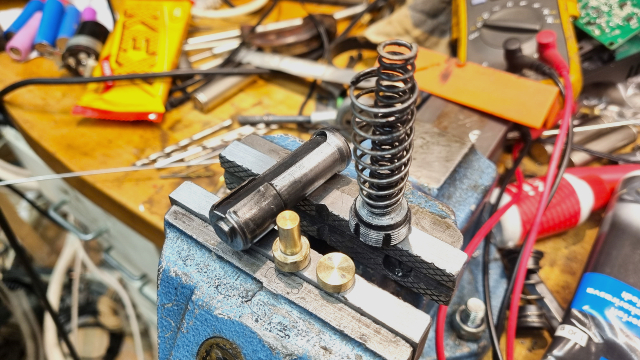
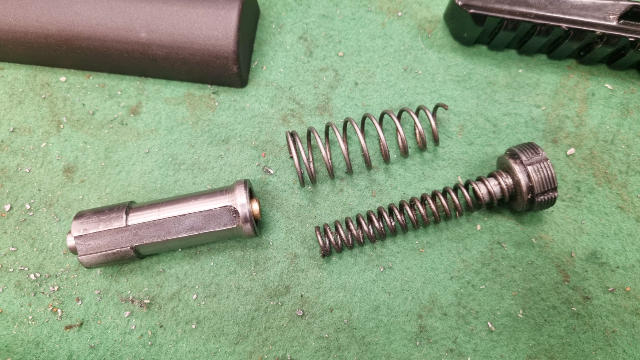
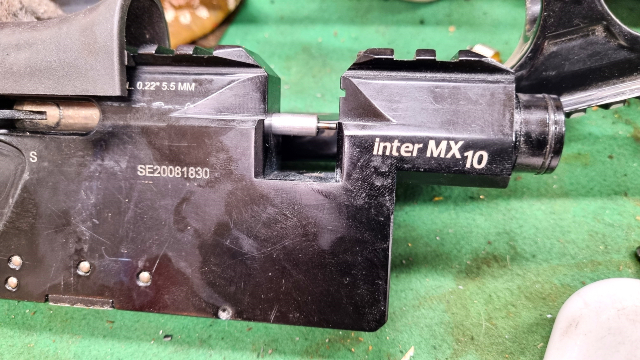
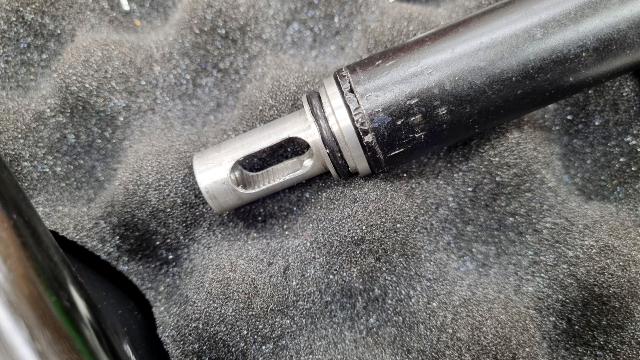
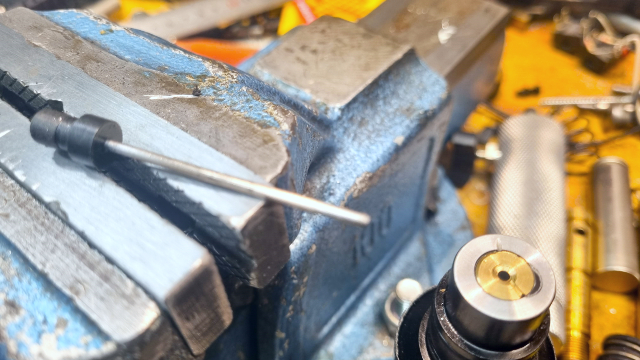
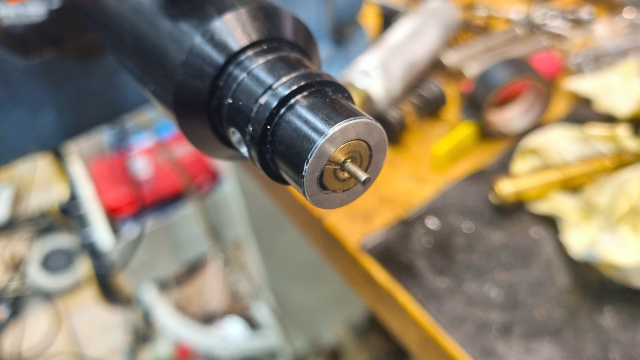
    Probe though is a rather smart spring loaded setup. However with a set depth completely out of whack so.. yep. You guessed it, had to make a fresh probe end for the thing too. In turn, as it turned out, i had to increase diameter of it slightly to keep it sealing as power went up.. at that.

    So. All these negatives out of the way (and there´s more, trust me) how does it shoot?

    Well.
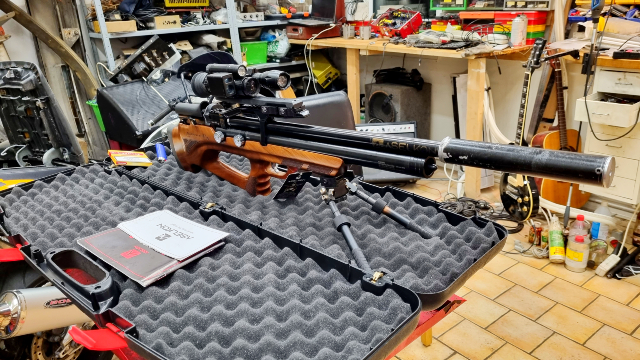
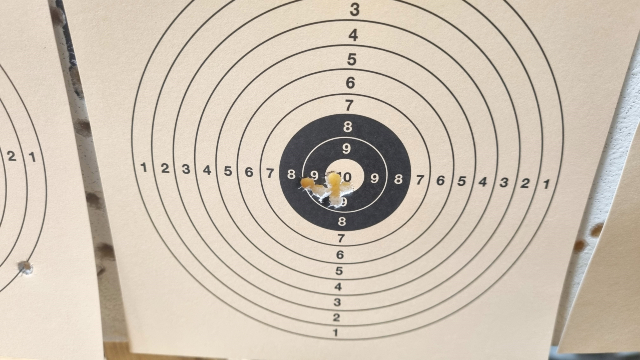
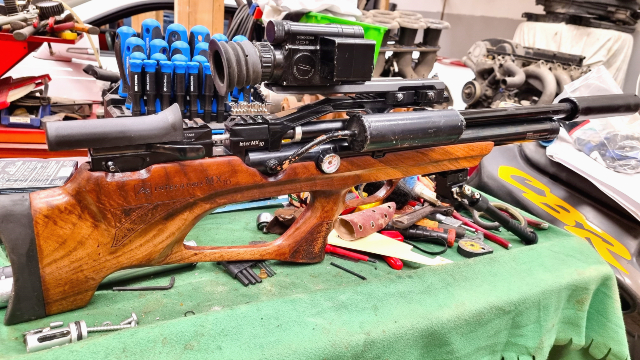
    Enter the ugly duckling i´d say cause that 550mm long 22 barrel will... shoot, and shoot very very well at that. I´ve had it adjusted beyond 100J and then some but have since backed off a tad spitting 36 grain slugs out the nozzle going approx 920-930fps. Ample and then some for my use!


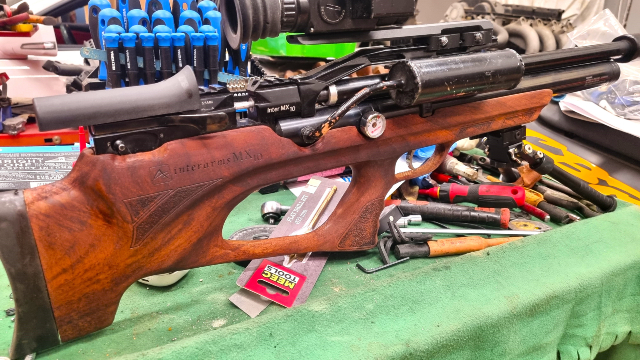
    What i´m at currently is getting rid of that god awful clear coat paint job. I abslutely LOATHE clear coated wooden stocks so..

    However.


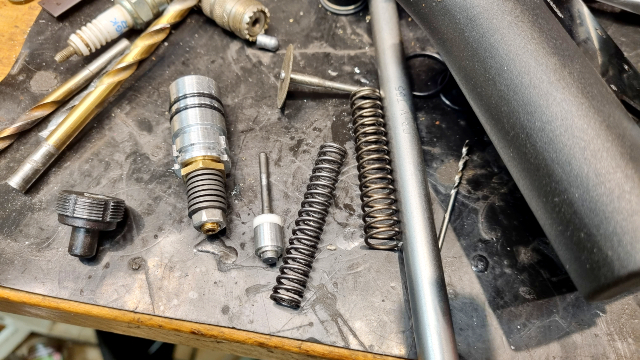
    No. It lacks plenum volume to support any appreciable amounts of power so reused one i had made for my Reximex Zone and... HELLO!

    Yeah. This thing smacks the rats you won´t believe and this with surgery accuracy. AMAZING accuracy even
    Now WHERE the *ell did that come from?!?


    Yeeeez... yeeeez.. of course i went at it on the hammer setup as well.

    So. In summary.
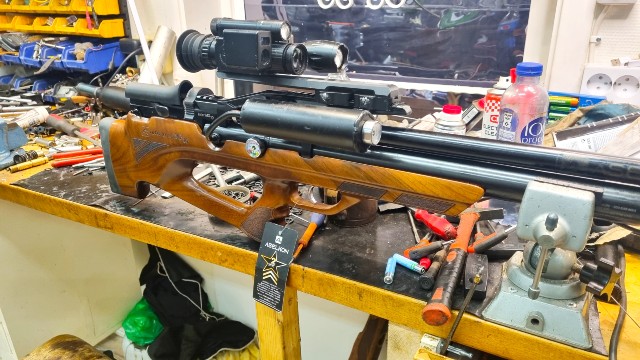
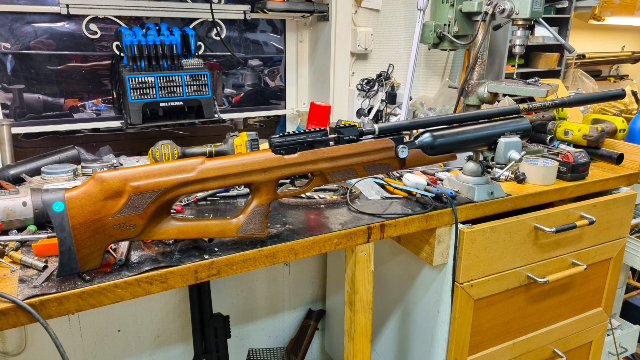
    This Aselkon has craved a HEAP of work to clean up and work as intended, even the Pic rail was off for the love of gawd, but that invested this is now actually a rather hard hitting and well performing piece of kit.
    Let´s be honest.. it really is.

    Yes. I´m scraping the clear coat off of there bit by bit using razor blades... and will keep doing so until clean from that garbage. Then it might very well be i redesign the stock a tad in an effort to save a bit of weight, cause a light weight she´s by any measure NOT.
    Took the bare stock to the scale and it told 1100 grams so.. Going to look into that.

    However.
    Would i recommend this Aselkon to someone else out there?
    HEEEELL no! There´s WAY better rifles to be had for the same money. Me putting the effort into this one to turn it around, has it been worth it? Depends on how you regard it i´d say, cause from an economics point of view.. not even CLOSE. However from a practical view i ended up with a REALLY accurate PCP at coffee n change in relative terms.

    Would i do another?
    As i feel about it right now, no. No i would not.
    Should yet an Aselkon drop into my knee i´d set it aside to work on when i felt the urge.
    That aside, again no.

  3. #3
    Join Date
    Aug 2016
    Location
    Melton Mowbray
    Posts
    2,066
    What a good write up.
    Sometimes they struggle st sub 12.
    Repariere nicht, was nicht kaputtist.

  4. #4
    Join Date
    Jan 2022
    Location
    Göteborg
    Posts
    215
    Thx.

    Yeah, i can only imagine.

    However, if you look at this piece like would you an over priced kit gun instead.. then it kind of becomes a different animal doesn´t it?

    Anyways.
    I got around to taking that god awful clear coat off the stock and there´s actually a rather neat piece of wood underneath all that plastic goo. Hue of that wood though is rather light.. no likey.. So took some alcohol based dye to it not knowing what to expect.

    Easy runnin´s tho.. it digests that dye like a camel out of water. So she´ll come around, this time out sans that absolutely crappy plastic goo it´s draped in stock. Just lovely oil based finish on the bare wood..

  5. #5
    Join Date
    Mar 2011
    Location
    loughborough
    Posts
    840
    Good post Bud, I do like a bit of engineering .

  6. #6
    Join Date
    May 2006
    Location
    Birmingham
    Posts
    3,642
    Badly made rifles even though they look good on the outside. You did well on getting an Aselkon working effectively.

  7. #7
    Join Date
    Jan 2022
    Location
    Göteborg
    Posts
    215
    Thx boys.

    Taking a step back it seems Aselkon have at least TRIED getting their *rap together since, looking at their homepage as late as today.
    In turn, there´s so many in bed with each other when talking the Turkish mans so.. who knows? Fact is, is it even doable repairing this bluntly put scarred rep of Aselkons?
    No idea TBH.

    Let´s be fair, this MX-10 is the former former generation Turkish guns and at the time... many of them were rubbish. At least in my opinion they were, and it shows very well when you start taking a more in depth look at how some of them are trying to progress to this day.
    Take the Hatsan Factor for instance. That´s a semi recent unit, and still... i´ve had them in the door with their barrels machined on the wrong end. I´ve seen screws literally falling out of them, for a brand spanking new right outta the box unit.

    Yes. Yes. I´m all to aware that Hatsan since has fallen back and regrouped on the Factor, these days in the market as "sniper" versions and god knows what... Issue i´ve got with that is that it is a rather dubious design from the onset and as the actual "frame" of the build hasn´t changed.. well. Whatever.. kind a..

    MX-10 though.
    It simply wasn´t put to the test pre production, and that´s my final word on it.

    For instance.


    Trigger blade is connected to the trigger assembly via a rod. There´s actually nothing inherently wrong with the actual setup (apart from lacking any and all adjustment stock, which in itself is moronic as all it took to literally TRANSFORM that trigger was a threaded hole and an M3 grub screw)..
    Hoooooowever..
    Trigger blade resides within the structure that is the scope rail and so on too, by regular bullpup standards by now. Then there´s two allen screws that work a sorts of clamp ( see picture), that keeps this structure to the tube/tank right.
    All good except.. when you tighten down on them screws to make that structure stay put (in all fairness there´s yet another allen screw out rear that does it too) it clamps down so hard on the trigger blade at first that it goes solid.
    IMO that´s fairly poor engineering to be honest. Well. Thus i turned two small bungs/spacers to make that go away, only to realize that that rod came to interfere with the rearward one AND the actual structure too!
    Ok.
    Now. As clearly seen in the picture what i´ve done was something as simple as clamping down on the rear screw to then run a drillbit through there to hand that rod somewhere to go.
    Presto.
    Done deal.
    The question here though, seeing how extremely little that´s been spent on both the trigger blade, the rod and in turn the sear of the trigger group WHY wasn´t this done inhouse at Aselkon? Give me ONE good reason for this, cause if that made production cost jump say 5£ chalk that up on the presumtive customer as far as MSRP and walk away cause i absolutely GUARANTEE that the net result would have been a MUCH happier such customer.
    To me that´s just poor economics.


    Ditto the "other end" of that sub structure. The actual Pic rail. Mark my word, that thing was first up so full of their applied plastic goo nothing would really fit. But to add insult to injury so skewed it was "outta sight". Bent, twisted n warped at the same time.
    To clear it all up, as an issue?
    Baah... took me at least a minute and a half on the belt sander. At least...
    Again.
    WHY wasn´t this done at Aselkon? Really? What is this BS? Cause the thing is, with this build it never stops. You correct something just to realize that... that.. and.. that.. and.. that and so forth needs correcting just as much.

    Indeed. If we instead regard this as an overpriced "kit" gun i´d say we´re better off. At least we´ll keep our sanity way longer cause.. so help me gawd.. A never ending story.

    But, that being said.


    This i believe at 36 meters (like what? 40 yards?) WITH a scope adjustment (as you can see some of the first shots printed to the left). In other words disregard the prints to the left, rest of it is a clip worth of 36´s going 920-930-ish @ said distance. Gun in turn, sporting the mods it does, can be run harder still. WAY harder even, and in turn is just as accurate using 40 grain 22cal H&N´s.
    That there.. is not half bad. Barrel has indeed seen a tad of TLC on both ends but.. regardless. That´s some pretty stout performance out of a unit that´s barely held together as it comes out of the box. Btw. I believe the twist to be on 1:15, so no wonder it favors the heavier offerings.
    In short, the actual HEART of this thing is good. The barrel.


    Then, please don´t judge cause this is FAR FAR FAR FAR from done. I added the picture just to hand an idea. If you compare vs above that "bar" at the bottom has been cut down quite a bit, and made way more slim too. The trigger guard has been reshaped a fair deal. That sweeping "cutout" on the stock has been cut further back, and now seeing the pictures myself will become even more so.
    In turn the actual pistol grip has been hollowed out, at first with a 22mm dia wood bit and then a 14 further on up. Out rear the buttpad came off and i drilled all in all 4 holes into it from the rear. Two on 14mm dia and then two on 20mm dia. All of them going as far in there as i felt safe.
    Didn´t get to that today but will put the stock on the scales tomorrow again. Last weigh in told 1100grams+ and my hopes are that i lost at least 300 all said. One thing´s for sure, that there is some seriously dense and hard wood, i´ll tell you that much.

    That done a lot of the "dark" of them different dyes used will go away as i keep sanding..

    Actually used it on the rats tonight again, they have made themselves scarce though.. so tonight ended in an empty bag. That being said, as you´re aware i design and make my own moderators and as you can read in a different post i made a proto on a whopping 50mm/2" diameter and to keep it real..
    She´s not overly loud, very far from it. It´s just that perspective change and this unit is starting to hand power levels where a larger can is called for. We´ll see where that ends up.
    Last edited by Racing; 29-02-2024 at 03:10 AM.

  8. #8
    Join Date
    Jan 2022
    Location
    Göteborg
    Posts
    215
    Alright lads.
    Progress.


    Now for additional liberal coats of linseed. Ya know, all said... WHO came to the conclusion that draping that downright wonderful piece of wood in plastic goo was a good call?
    Really?

    Yeah. I´d say i´m finally closing up on full circle with this piece.


    notice how the opening on the stock has been pushed rearwards.. the lower "bar" taken down severly and in turn the trigger guard reshaped massive. It´s to the point the actual trigger about disappears. At that.. drilled out as far as i could/would muster from the rear and ditto for the pistol grip.

    Remains many many many coats of linseed.... coupled with "oil sanding" using finer and fine grit to hand this POS some "natural" finish all said..

  9. #9
    Join Date
    Feb 2012
    Location
    gateshead
    Posts
    24,436
    just as well your handy with guns

  10. #10
    Join Date
    Jan 2022
    Location
    Göteborg
    Posts
    215
    Thanks.

    Layer by layer of linseed oil going on and I have to say
    ..just looking better n better.

    I do love oiled n buffed wooden stocks. Issue is, what to do with it apart from what's already been done?

    Reminds me..need to order way more 36s...

  11. #11
    Join Date
    Jan 2022
    Location
    Göteborg
    Posts
    215
    Yeah.
    So i´m an idiot.
    Got offered a MX-9 "sniper" at coffee n change by same vendor... so i bought it.
    Knowing very WELL the amount of work ahead of me.

    Then again.
    This time i know what to expect and truly regard it as an "assembled kit gun". Cause that´s what it is.

  12. #12
    Join Date
    Jan 2022
    Location
    Göteborg
    Posts
    215

  13. #13
    Join Date
    May 2013
    Location
    abingdon
    Posts
    1,601
    Hello, great posts there, look forward to the next rifle refurb

  14. #14
    Join Date
    Jan 2022
    Location
    Göteborg
    Posts
    215
    Ok guys.
    Have had this around for a while now, getting to sort out a few quirks and as such me thinks it´s time for a decent update.

    The bottom line?
    After this undertaking done this thing with ONE exception just plain works. It hits hard, it´s as accurate as i could ask and reliable.

    Or well.. it turned reliable.


    As power went up it turned out that the breech seal simply didn´t stay tight. Stock the actual probe is on 5.6mm, and vs the breech o-ring of choice that simply doesn´t cut it. As mentioned, this got more and more severe in all that power went up BUT is also a testament to that this really should be adressed for a 12fpe gun as well.

    What i did was cut the actual probe off on the lathe and turned a new one. This i did at a rather early stage, so there´s two revisions to this in short. Chamber on the piece comes in at 6mm flat so i ended up cutting one on 5.95mm which put a halt to that there issue.
    In other words?
    You guys out there with an Aselkon at the back of the gun safe, have a new probe made by your local machine shop.

    That done the thing really started to turn consistent, but this first as i picked the regulator apart and first up polished the contact points of the stacked belleville washers AND in turn polished the "anvil" for the thing out. That done though i have to say, set to approx 170 bar, that the thing is rather repeatable - judging by the onboard Mickey Mouse gauge at least.
    Yes. Accuracy indeed improved from this.


    Uhu. Fresh moderator too. By now this thing has downed its fair share of scaly tails, and keeps at it no doubt. Albeit 12fpe and all that it might be worth of notice that this thing copes an easy 135J/100fpe without breaking a sweat.
    No. That´s not where i´ve got it set, but as many of you are aware i tend to use hollow point slugs and for the time being it´s been either H&N´s 36 or 40 grain offerings. These shoot very similar, as in print on target.

    I came to make the trigger assy adjustable right, but leave it to Aselkon to eff that up too cause.. materials involved simply wouldn´t take the elevated hammer spring pressures why i have NOT been able to adjust this "on the edge" and keep it repeatable.
    I like my triggers very light and this thing simply refuse to cater to that. Ergo.. for the long run i guess i´ll be making a new hammer down the line.
    What DID help immensly though was recutting the closing angle on the sear. By increasing incline ever so slightly the thing SURE hooked up like a ton better. Trigger pull is still rather "breaking glass" just stiffer than i enjoy - which i certainly can get accustomed to too.

    This said.

    That 1:15 twist 550mm jobbie for a barrel is an absolute gem. It really is, and seeing that twist it of course caters to heavier pills (being a 22cal) being used. Indeed. It will by no means hand "bad" results with lighter pills it´s just that it REALLY shines as you start feeding the thing the 33.95 JSB pellets or.. as mentioned the heavier H&N slugs.
    Effect on the scaly tails is downright frightening almost cause.. again.. them hollow really ARE the bees knees as far as putting pests down. Not only that, it´s easily accurate enough to hit a mouse at 50 meters in the dark, using the NV-008 LRF ontop.


    You´ve read me rant on about the performance of suppressors/moderators and this one is no exception. It stands to reason that as power goes up the demands on the moderator of course goes with.
    I´ve come to a point where i get real good results "go big or go home" TBH and then with the combination of an active shroud coupled with said mod. Issue here, on the MX-10, is the physical restraint of proximity between barrel and tank which limits the shroud tube to a mere 23mm dia. The norm here, to me at least, is a 28mm ditto which of course makes for a rather vast difference in both area and volume.
    That being said, note the rather small exit hole on that there moderator, which is on a 50mm diameter. I´ve touched upon this before, suppressor efficiency is extremely much about baffle and end cap through hole diameter, why IMO all mods needs to be installed using a dial indicator on a lathe or a pair of V-blocks.
    Yes.
    It DOES make for a difference, one you simply won´t believe until done. Take my word for this.

    That rather massive 50mm/2" can becomes viable as power goes up to still keep things REAL silent. Truth be told though i wouldn´t exactly cry myself to sleep if that shroud tube would have been on 28mm...
    Regardless.
    As you can gather 40 grain pills running out the snout at mid to high 1000´s makes for some power and this bring more noise, which needs to be controlled. At least for any pesting within city limits, and this setup sure does.
    No.
    It´s still not "dead quiet", as you can get a say 60J unit.. but at least quiet enough that noone cares.

    Summary thus far?
    Well.
    For better for worse where i´m at i have to give this piece flying colors. It´s that simple, it has really come the full 9 yards and has come to prove it. A contender for the more expensive PCP´s i´ve got?
    Nah. Not really. A solid and decent performer that hands all i can ask tho, yes. Certainly.

    So the take from all this then, i guess, is that them Aselkons CAN be of use - for those not all thumbs. Regard them as a "rifle kit" instead of something to use as you lift them out of the box, cause that´s really what they are. Although assembled i guess, but..
    Worth it?
    I´d be lying if i stated to be anything but happy with the outcome here so.. albeit a c*apload of work i´d vote yes for those on the edge. Tearing them apart to build them up again to become something usable is certainly doable, and you end up with a VERY well performning cheap PCP that "all" doesn´t have.

    The MX-9 (the rifle version i´ve also got) still got a few odd jobs before full circle but that being said i´ve got no doubts what so ever it´ll follow this MX-10 down the rabbit hole.

Posting Permissions

  • You may not post new threads
  • You may not post replies
  • You may not post attachments
  • You may not edit your posts
  •